
In eCommerce, understanding your customers is key to driving sales and enhancing engagement. WooCommerce, a popular choice for online store owners, allows you to manage your products and transactions effectively. However, one of the challenges WooCommerce users face is the lack of native functionality to sync customer data with Customer Relationship Management (CRM) systems and email marketing platforms. This is where the FuseWP WordPress automation plugin helps bridge the gap and empowers store owners to leverage their customer data for more targeted marketing campaigns.
Integrating WooCommerce with your CRM or email marketing software lets you gain valuable insights into customer behavior, create segmented contact lists, and automate follow-up communications. This article will guide you through syncing WooCommerce customers with your chosen CRM and email marketing systems using FuseWP. This will help you unlock the full potential of your customer data and ultimately boost your online sales.
Introducing The FuseWP WordPress Plugin
FuseWP is a WordPress marketing automation plugin that enables you to sync your WordPress data with various email marketing platforms and CRMs. It allows you to set up automated syncing rules that add WooCommerce customer data to your email list based on their actions and stages in the product purchase journey. When this data changes, it is automatically updated and moved to the appropriate email list in your CRM.
Besides WooCommerce, FuseWP integrates with several WordPress membership plugins, LMS, and ecommerce platforms, including MemberPress, LearnDash, Paid Memberships Pro, Tutor LMS, etc.
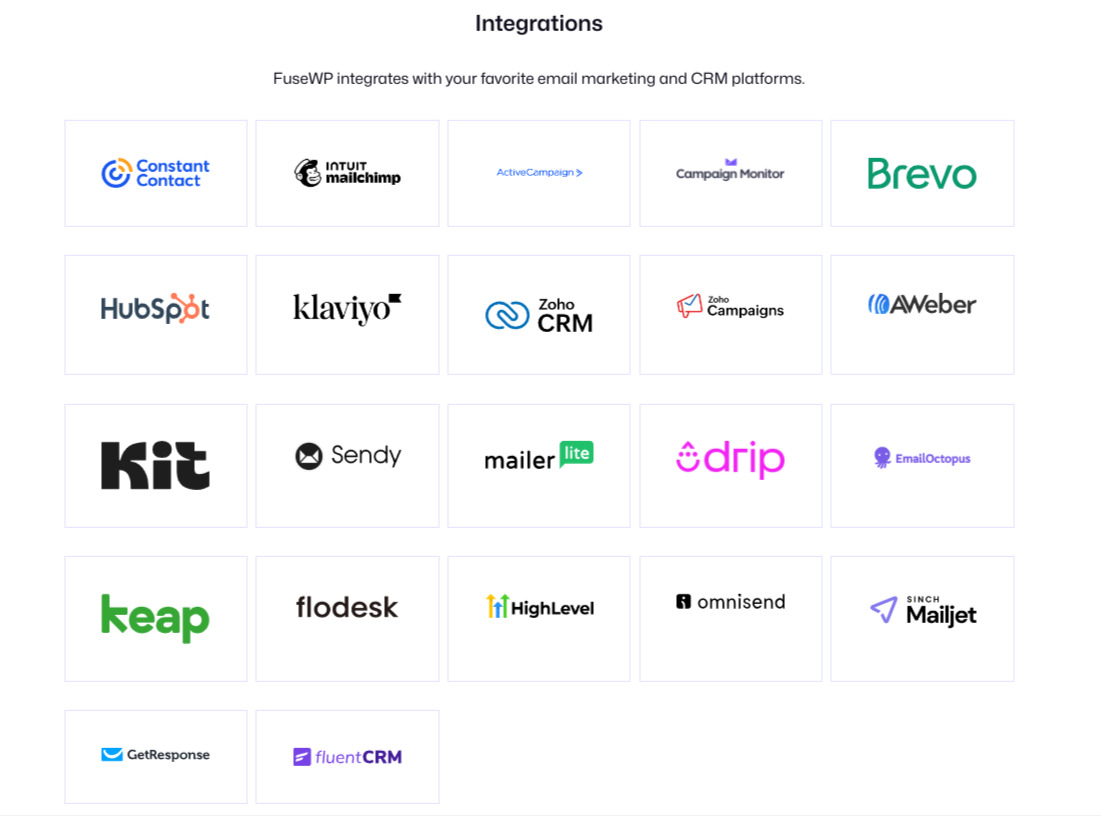
FuseWP supports various email marketing software and CRMs, including, but not limited to, Kit (ConvertKit), Drip, Brevo, HubSpot, MailerLite, Klaviyo, Mailchimp, Brevo, Constant Contact, HubSpot, Zoho, Sendy, Campaign Monitor, AWeber, and Zoho CRM.
How to Install FuseWP and Connect It to Your CRM
To get started, go to the FuseWP website and purchase a copy of the Plugin. After purchasing, you will receive an email with a link to download the plugin.
Next, go to your WordPress dashboard, navigate to Plugins >> Add New, and click “Upload Plugin”.

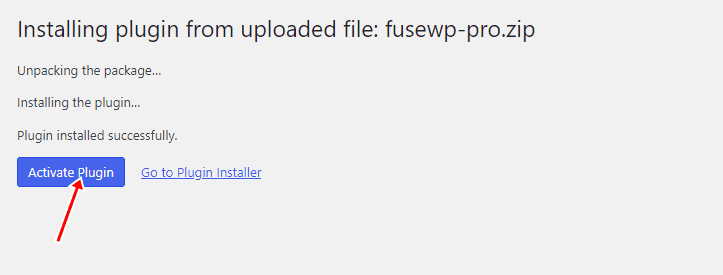
Upload the FuseWP plugin zip file and click the “Activate Plugin” button to activate the plugin.
Next, connect FuseWP to your favorite email marketing platform or CRMs.
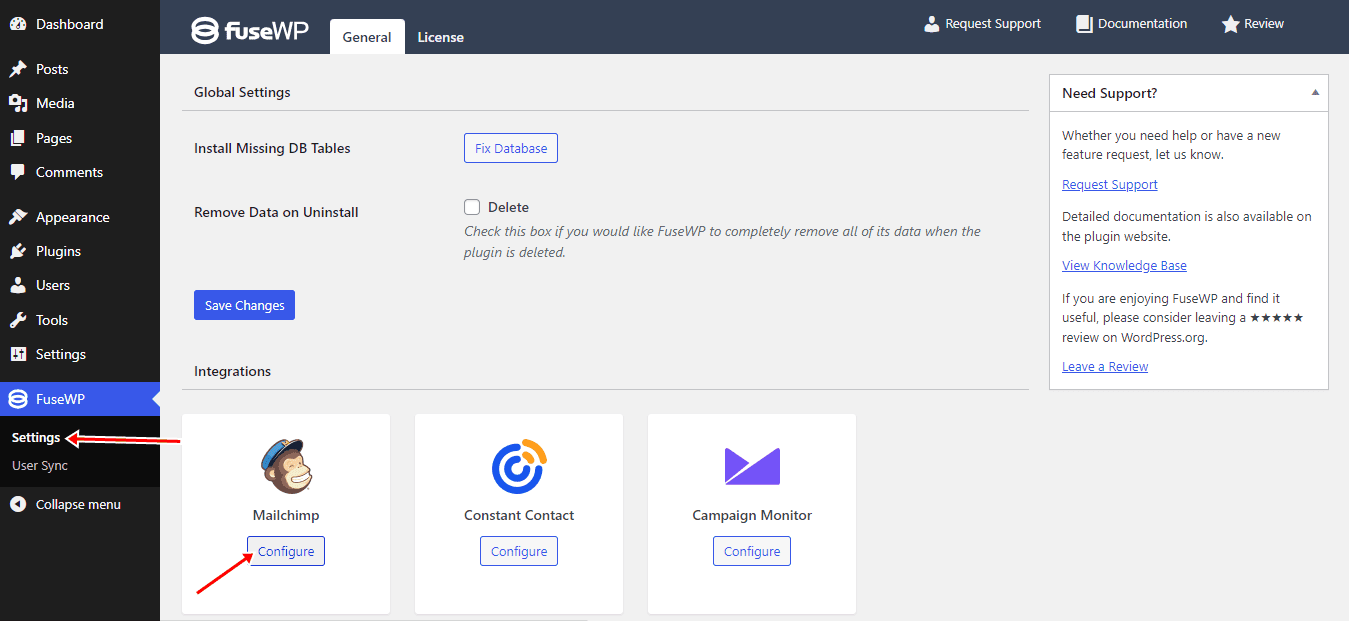
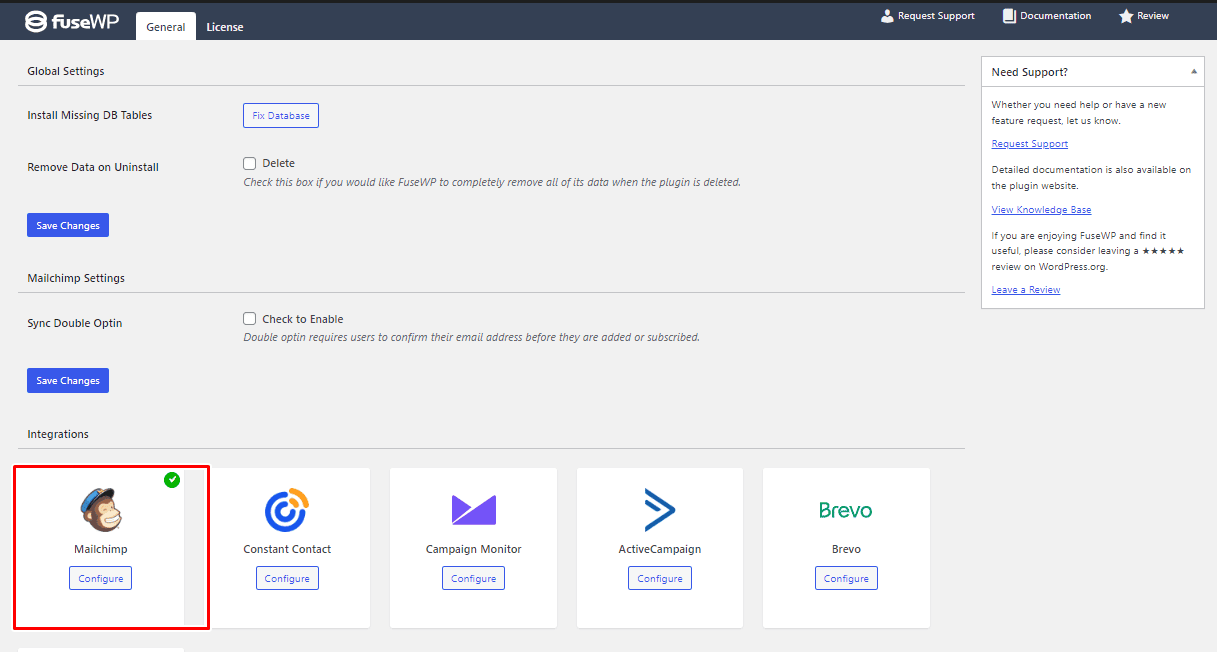
For this article, we will use MailChimp as an example. From your WordPress admin, go to FuseWP >> Settings. Scroll to the Integrations section and click the “Configure” button under the MailChimp logo.
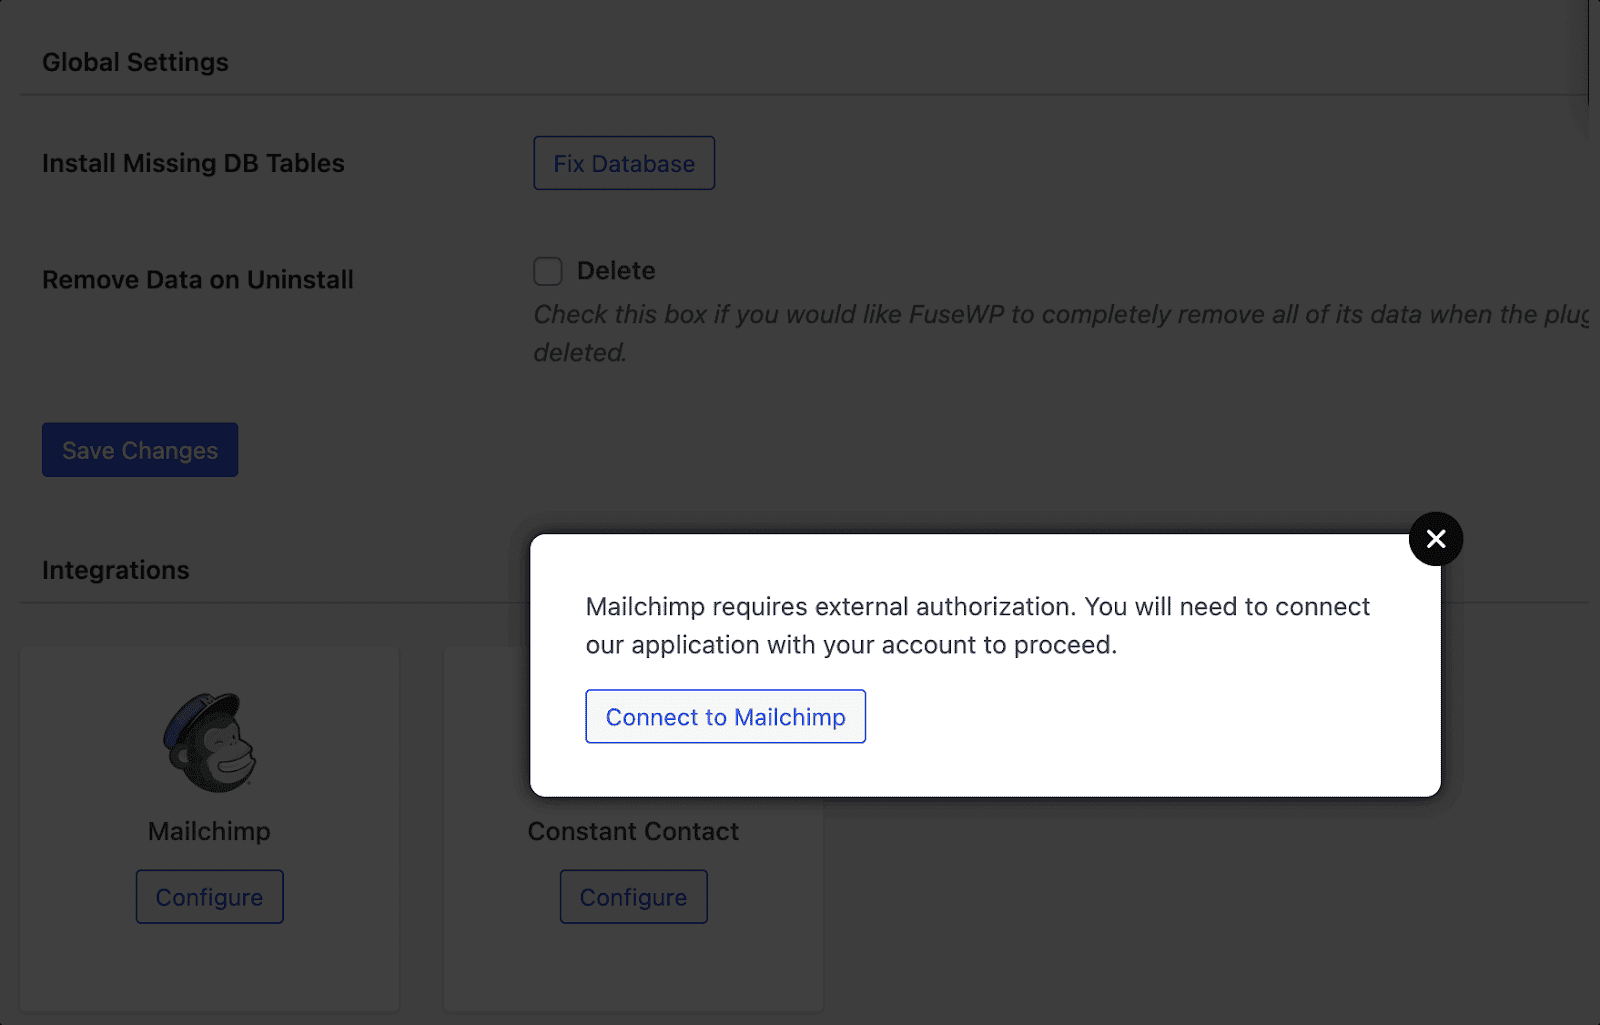
In the popup box, click the “Connect MailChimp” button.
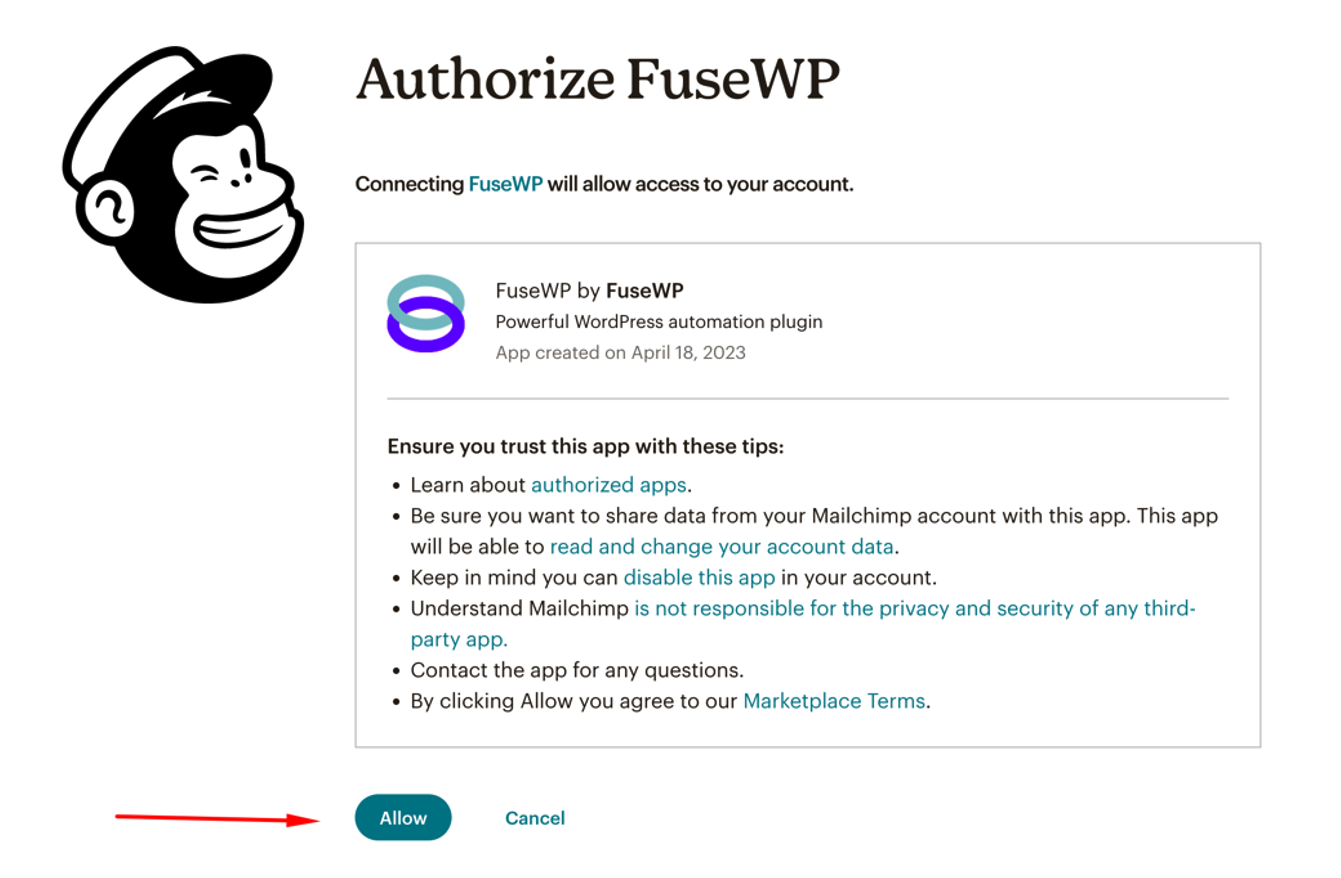
After clicking the button, you will be taken to the MailChimp website, where you can log in and authorize the connection with FuseWP.
After you authorize the connection, you will be redirected to the FuseWP settings page. A green checkmark should indicate that Mailchimp has been successfully connected to your WordPress website.
Adding WooCommerce Customers to Email Marketing Lists & CRM
Now that we have connected the FuseWP plugin to a email marketing software, we can set up various syncing rules to automate adding WooCommerce customer data to our email lists. Go to FuseWP >> User Sync and click the ‘Add New’ button.
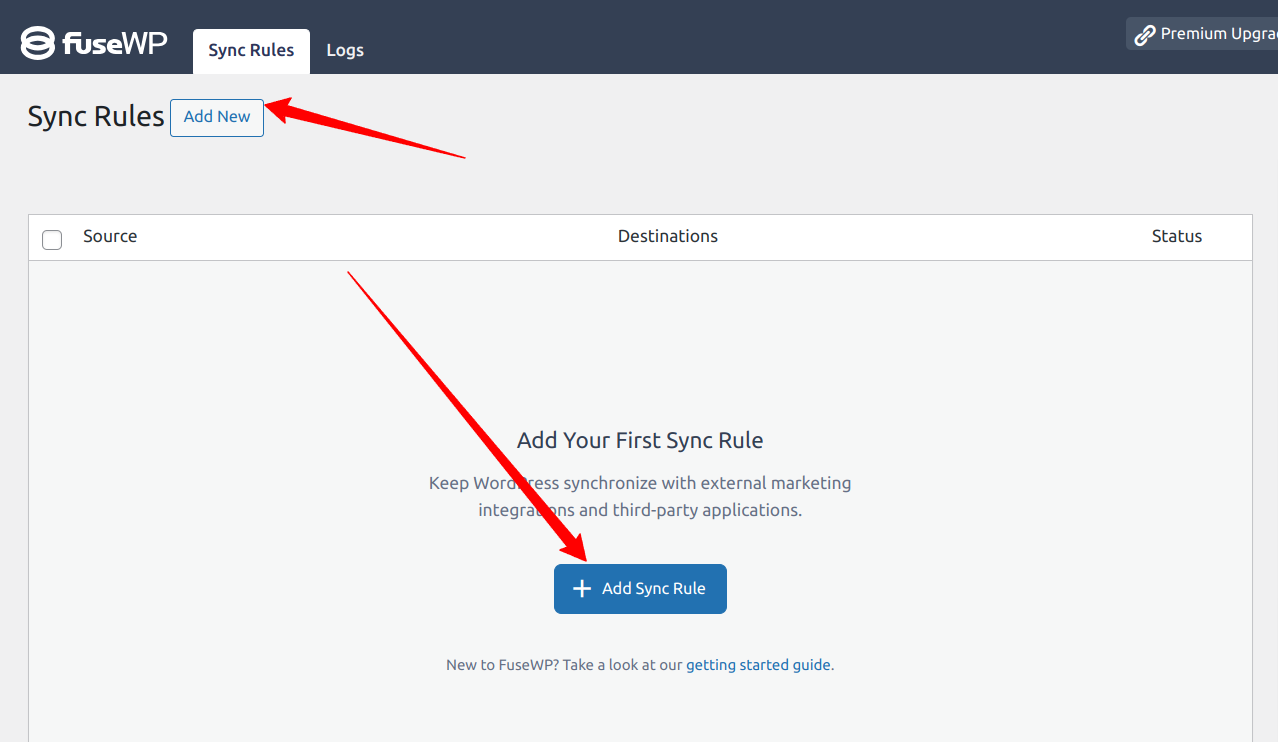
On the next page, you need to choose a source and a destination. The source triggers the data sync, and the destination sends the data.
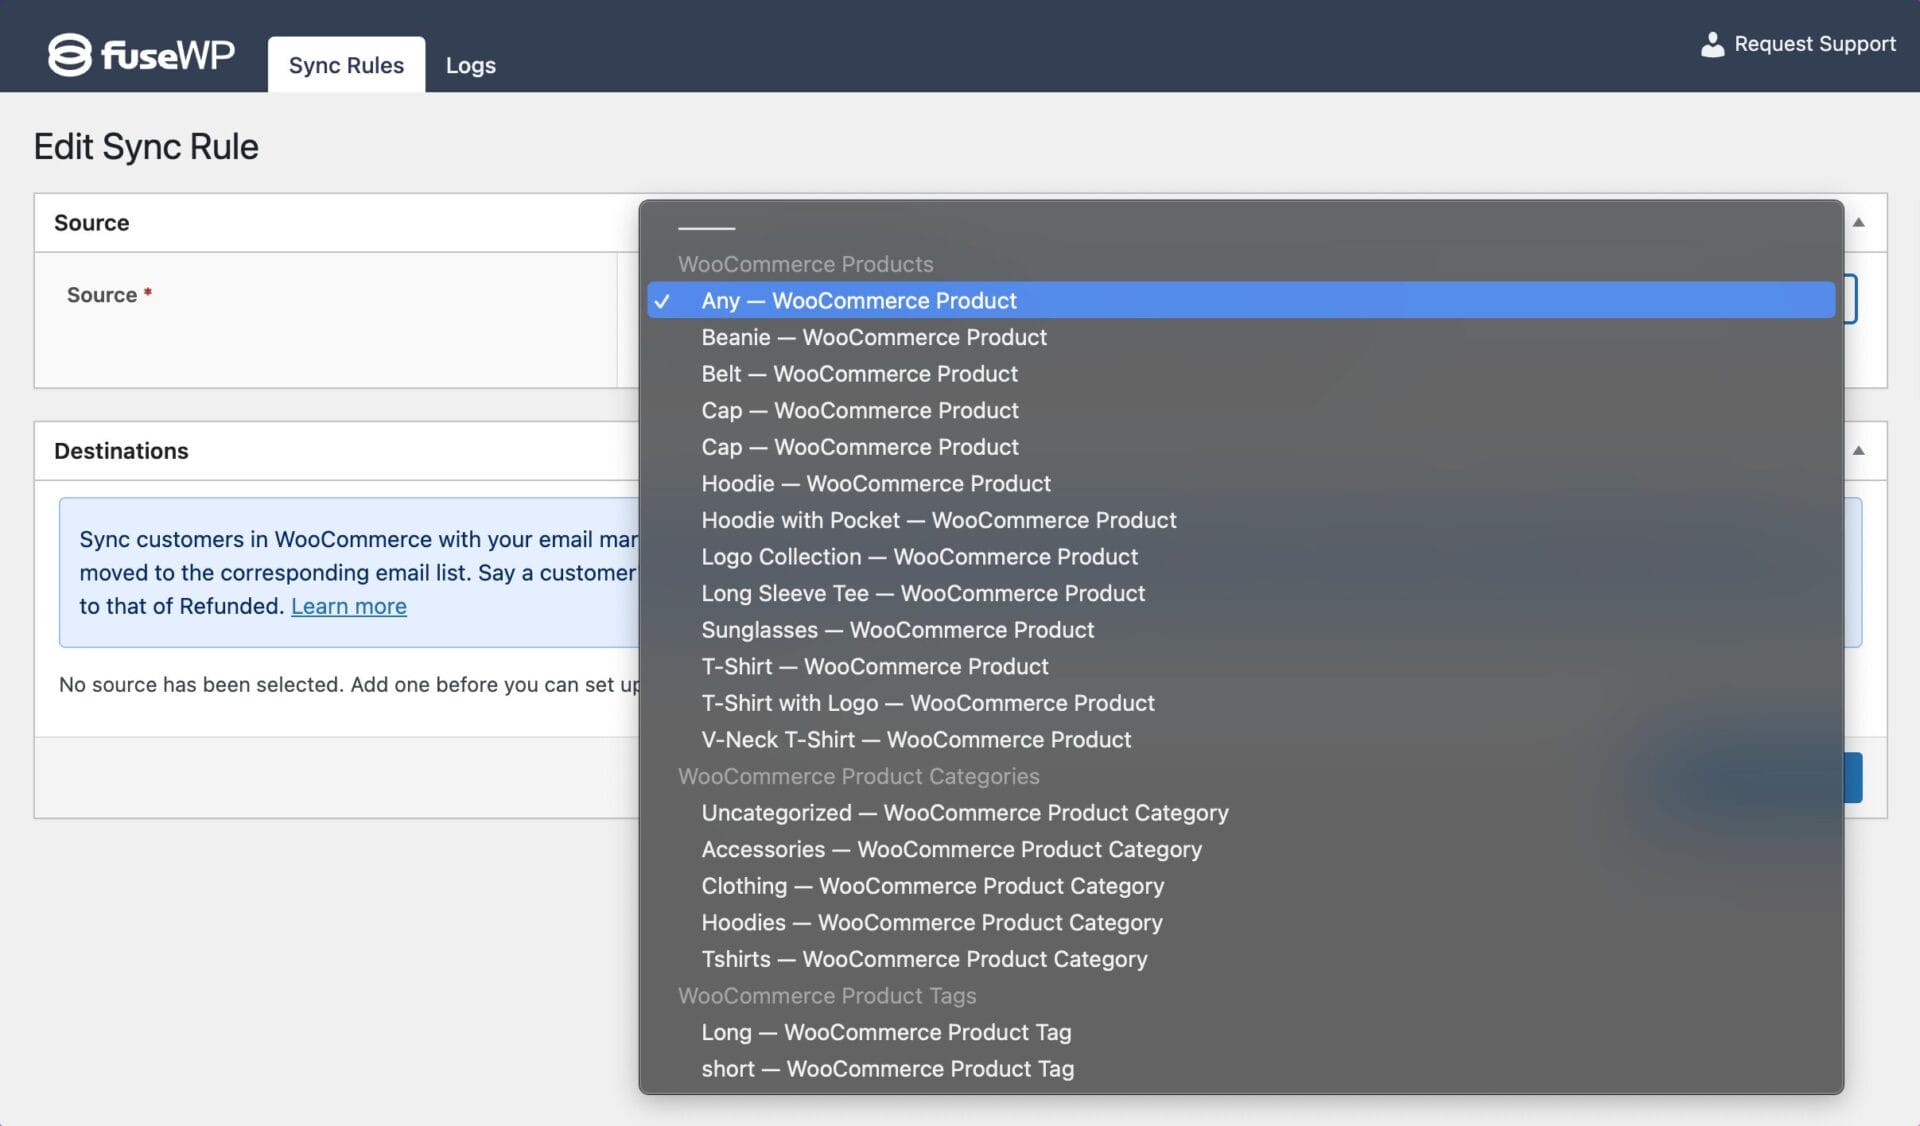
You can select various data sources, such as individual products, product categories, or product tags. FuseWP will monitor the customer data based on your selection and synchronize it with your CRM.
Next, click the “+ Add Destination” button to find various order statuses associated with the selected WooCommerce product. You can add multiple destinations with different order statuses and select the CRM or Email list to which data will be added.
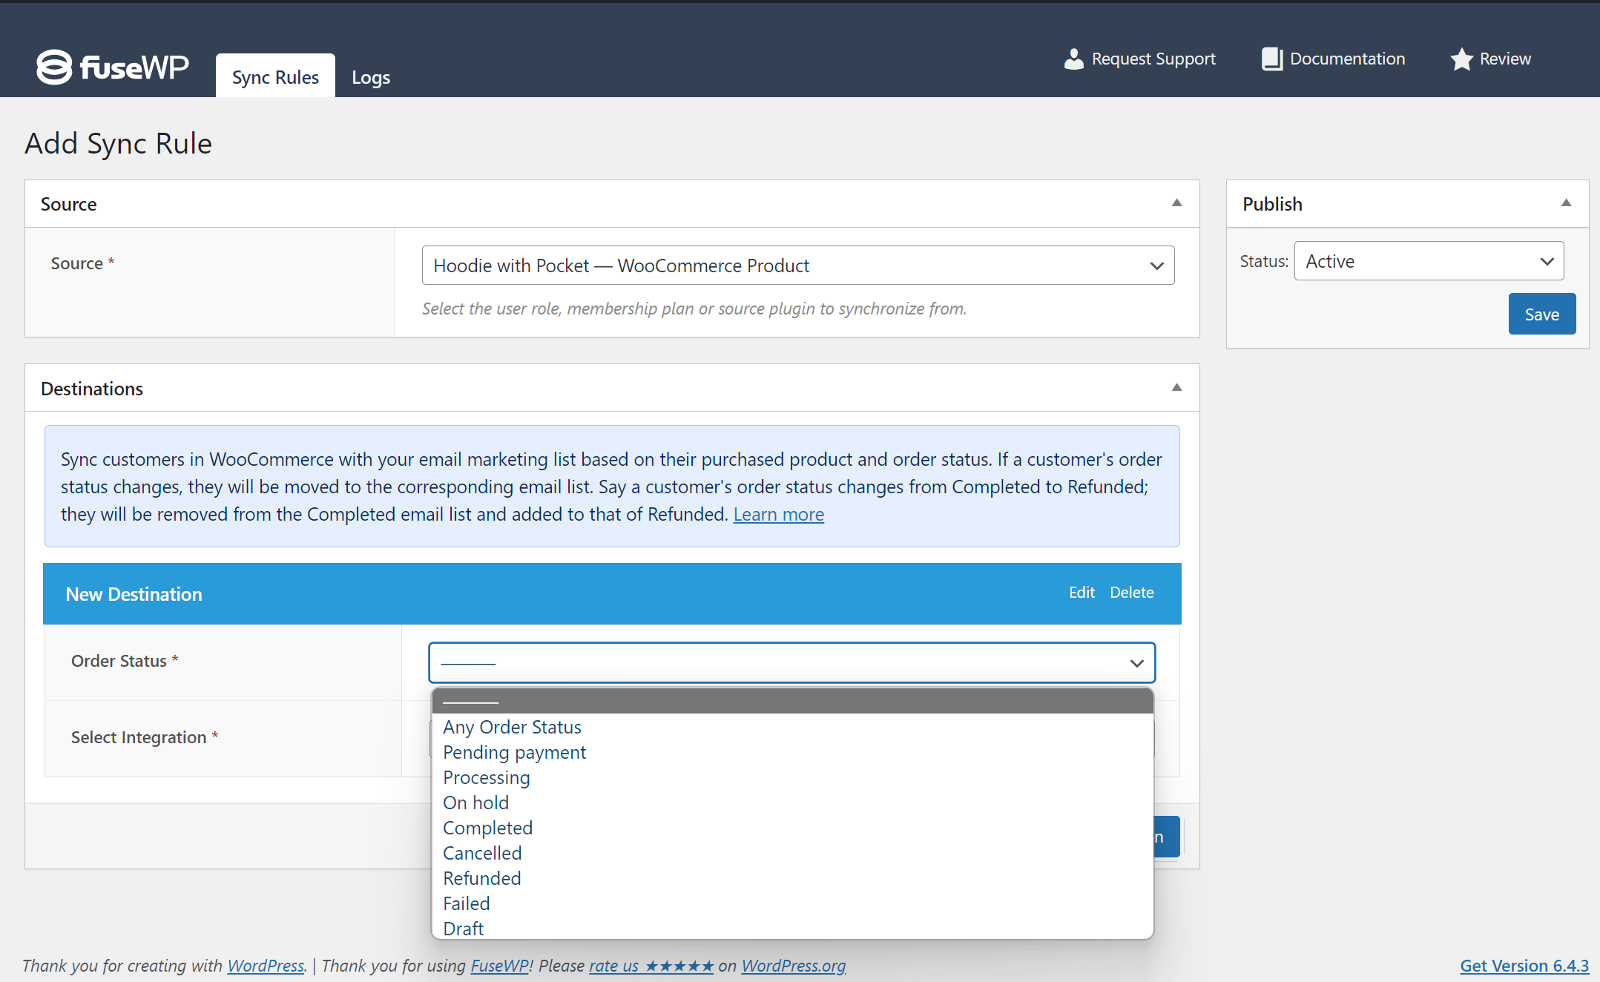
For example, in the image below, all customers that complete the purchase of the product will be added to our MailChimp email list called “Woo Store”.
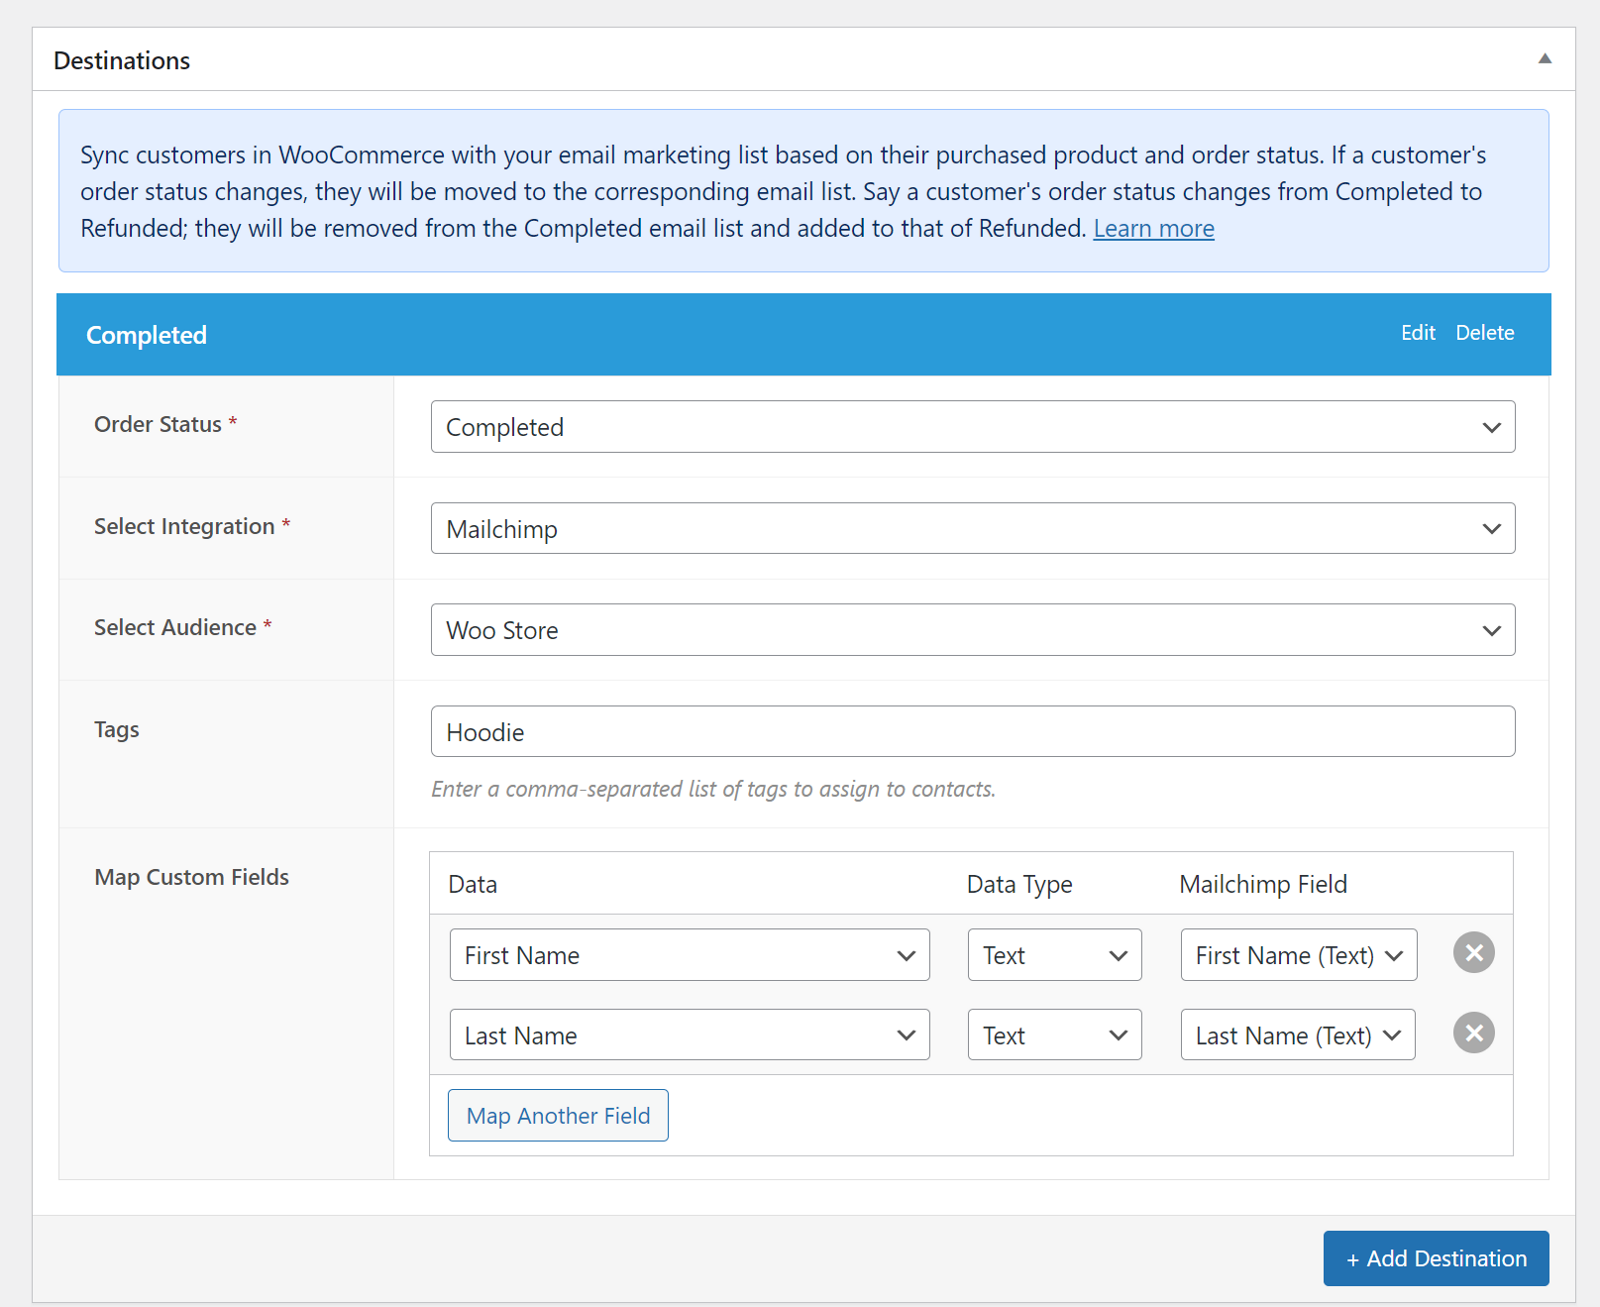
With this setup, customers are automatically added to the “Woo Store” list if the order status is marked as completed. If the order is refunded, they will be removed from this email list and added to the Refunded list.
Once you have finished the “Completed” order status destination, you can add more destinations for other order statuses, such as “Failed,” “Refunded,” and “Canceled”. This will ensure customers are moved to the correct email list when their order status changes.
Save your changes, and the syncing rule will be activated.
Adding WooCommerce Customers Based on Purchased Product Category
If you have a WooCommerce store with various products across different niches, a good strategy is to group them by categories. If you have grouped your products by category, you can build a list of customers based on their interests and send targeted campaigns that resonate with them.
For example, our WooCommerce store has a “Clothing” category. If a user buys a product in this category, we know they are interested in clothing items, so we add them to a MailChimp clothing list, and we can send them exclusive clothing deals and offers.
To configure this, go to FuseWP >> User Sync and click the “Add New” button.
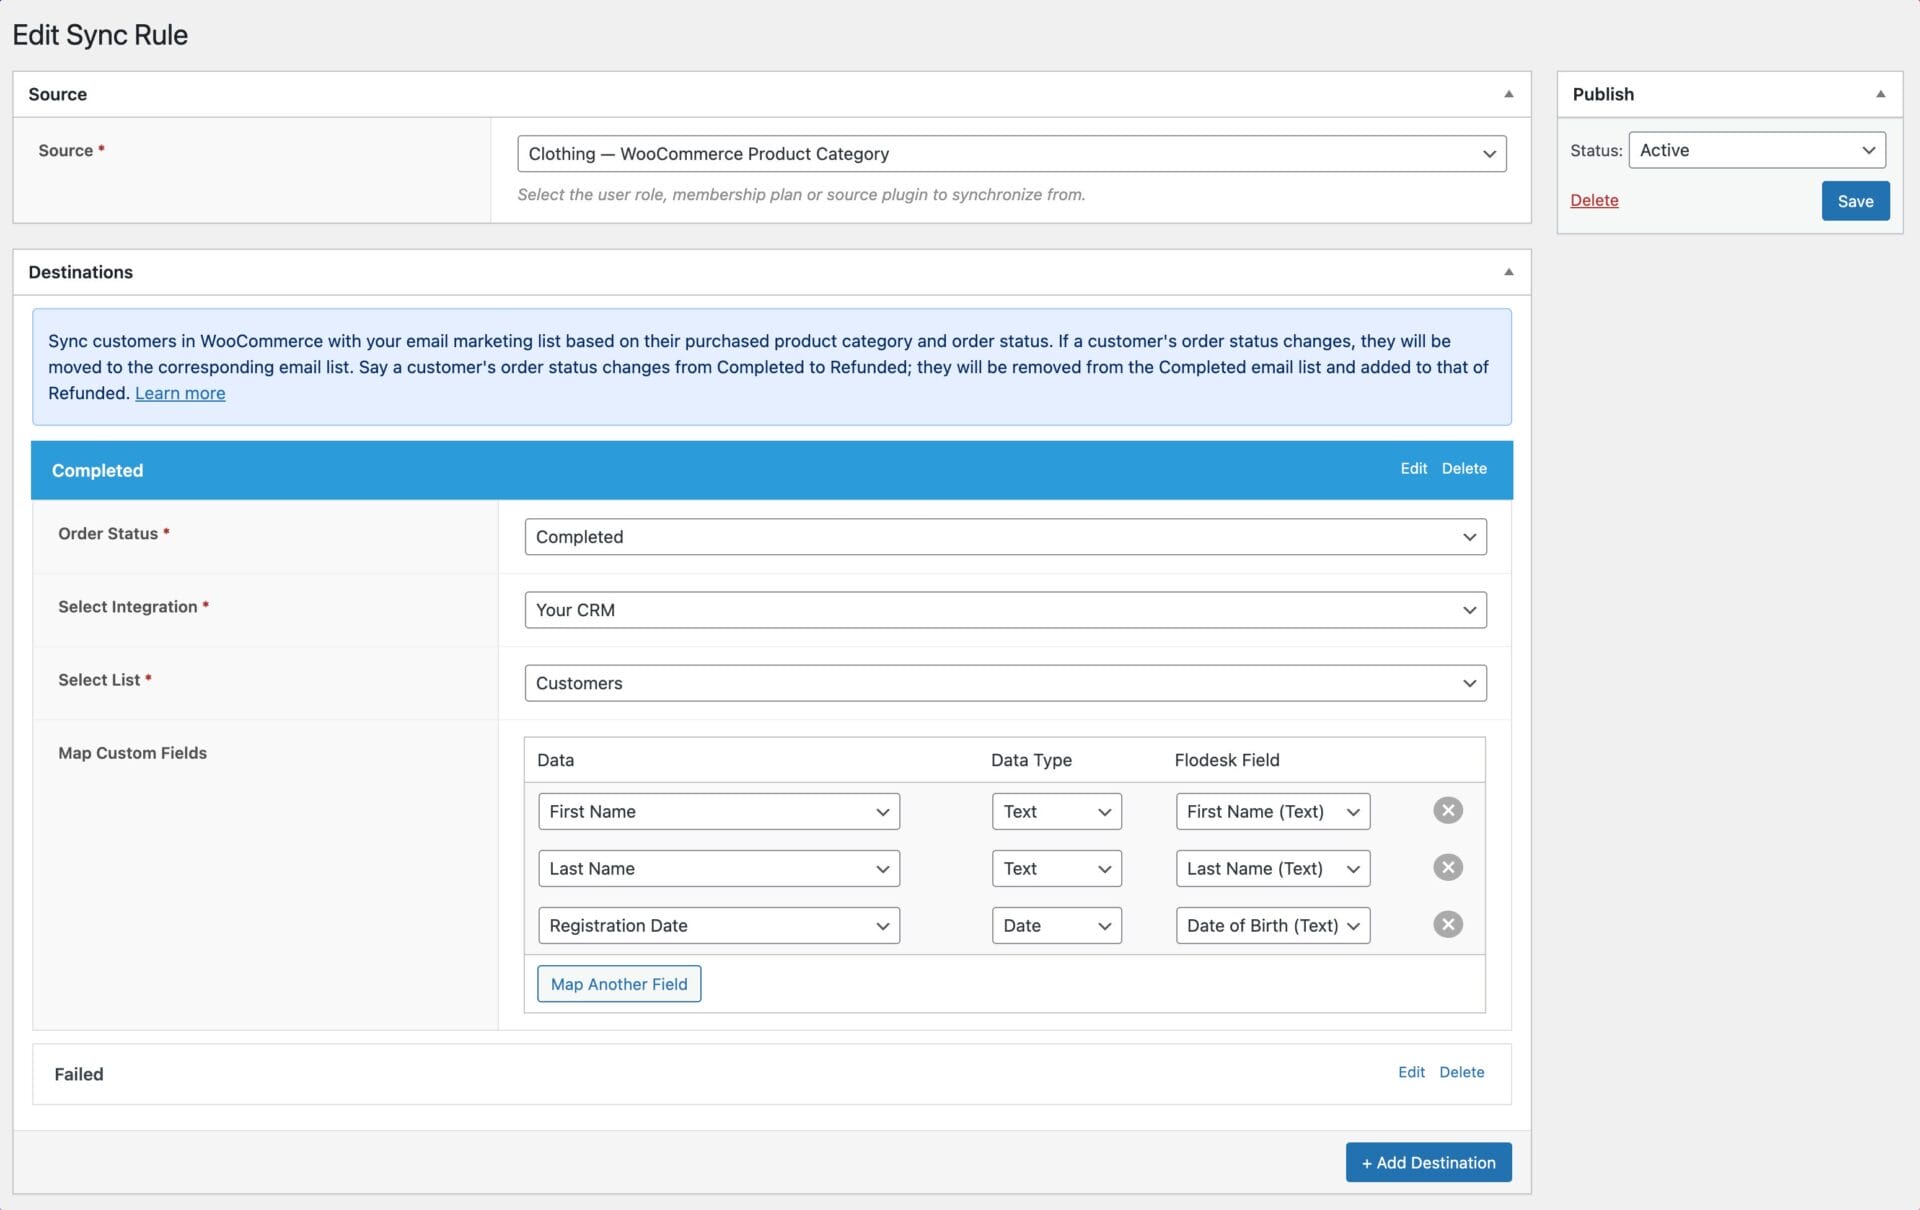
Choose a WooCommerce category as the source. In this example, we are choosing the “Clothing” category. Click on “+ Add Destination” to choose your Integration and the list of customers to be added.
In the image above, when customers purchase products from the Clothing category, they are automatically added to the “Customers” email list. If their payment fails during the WooCommerce checkout process, they will be added to the list specified for the “Failed” order status destination.
You should repeat the process to add destinations for other order statuses you want to include, such as Canceled, Refunded, and Failed.
Save your changes to activate the syncing rule.
Syncing WooCommerce Customers Based on Product Tags
Another segmentation you could do with FuseWP is to add WooCommerce customers to your email marketing list based on product tags. This setup will add your customer's data to your specified list when they purchase any product on your WooCommerce tagged with the specified tag.
To configure this, go to FuseWP >> User Sync and click the “Add New” button.
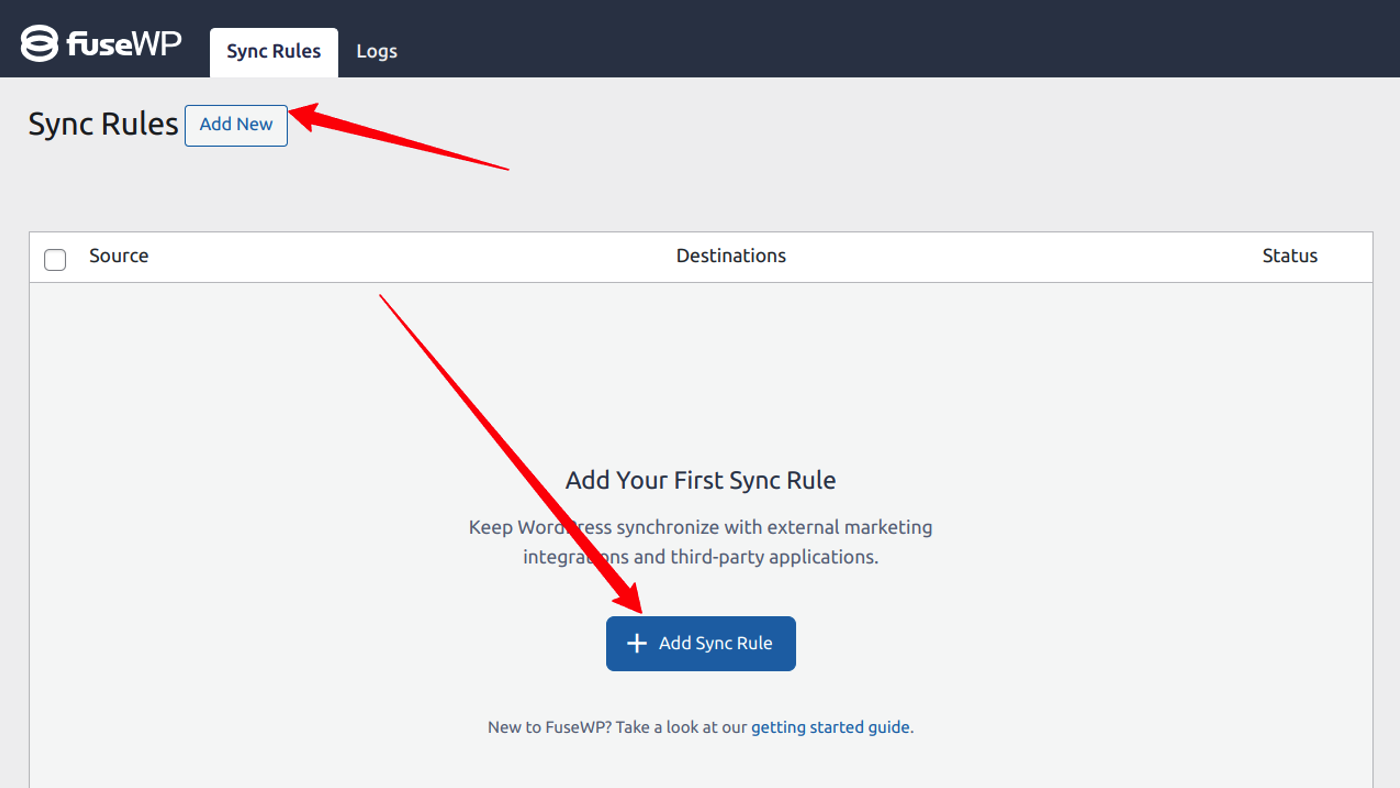
On the next page, choose the WooCommerce product tag as the source and click the “Add Destination” button to choose your CRM and Email list.
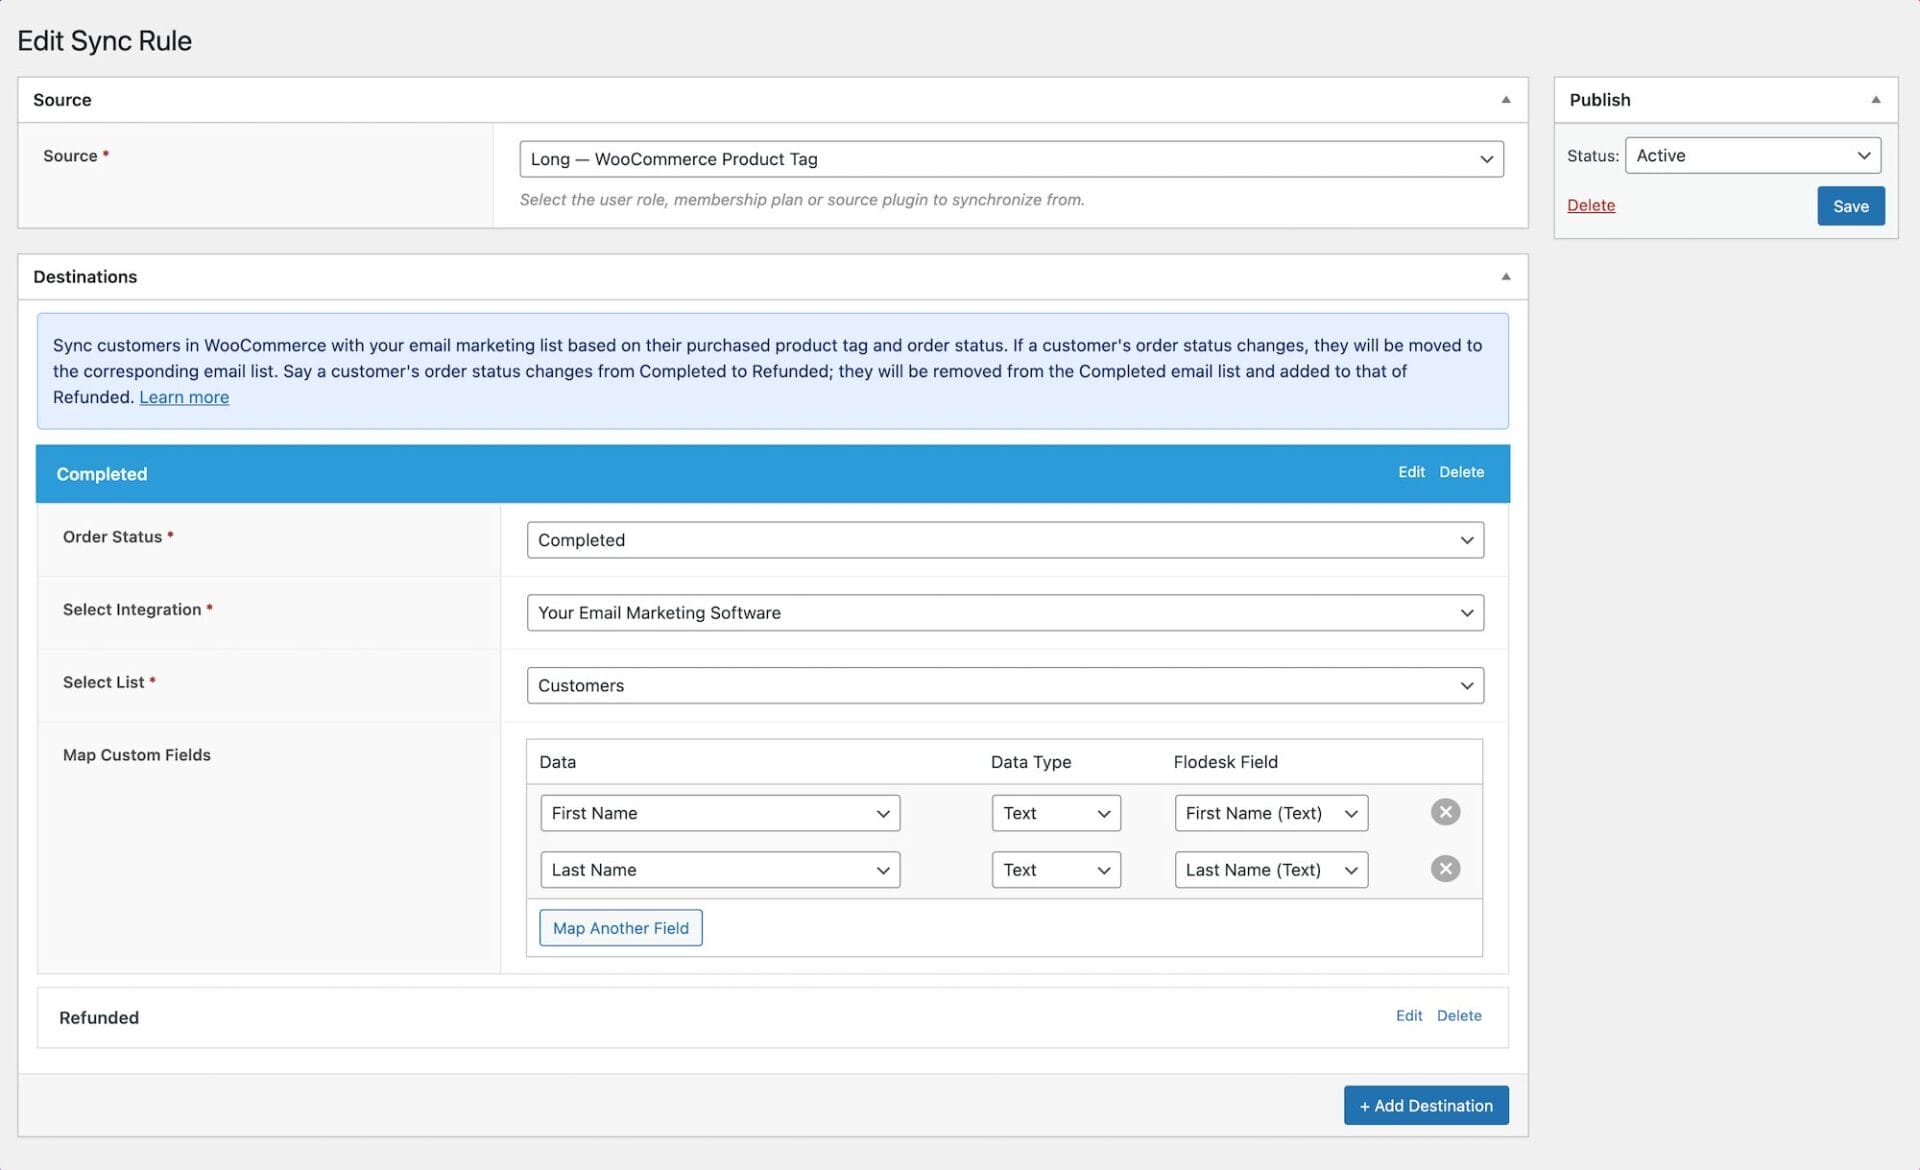
In the example above, customers who complete the purchase of any product with the “Long” tag will be added to our “Customers” email list. You should also set up the destination for other Order statuses such as Refunded, Canceled, or Failed.
Conclusion
FuseWP makes it easy to sync your WooCommerce customer data to a CRM or Email Marketing Software. With a few mouse clicks, you can set up a robust automated data syncing system between your WooCommerce shop and your favorite email marketing software.
We have covered some of the popular data synchronizations you can set up for your store and how to add your WooCommerce customers to your email lists based on purchased products, product tags, and product categories using the FuseWP plugin. Apart from the scenarios covered here, you can also explore the plugin to create various flows of data synchronization to your CRM.
Share this post
Leave a comment
All comments are moderated. Spammy and bot submitted comments are deleted. Please submit the comments that are helpful to others, and we'll approve your comments. A comment that includes outbound link will only be approved if the content is relevant to the topic, and has some value to our readers.

Comments (0)
No comment