
In the current era of clouds, many companies are replacing conventional desktop email systems like Outlook with cloud-based solutions like Office 365 in the era of clouds presently. Many clients in this situation search for a short fix to switch from Outlook PST Database to a Microsoft 365 Account. We are here to show you a method to address your issue. First, this article will study the main standards for PST conversion to Office 365. After that, we will go over the techniques to execute such a conversion.
Let us now go through clarifying the conversion requirement.
Reasons to Change from PST to Microsoft 365
There are various compelling reasons for doing this. We will nonetheless go over some of the most frequently recurring ones here.
- Local to your device, PST files cannot be accessed from anywhere. Your emails are stored on Office 365 on the cloud, which lets you access them from any device with internet capabilities, laptop, or tablet.
- Local PST files can be subject to unintended deletion, causing data loss or hardware failure. Automatic backups and security solutions under Office 365 provide amazing email safety assurance.
- PST files can expand quickly over time using limited local device storage capacity. Enough capacity in Office 365 allows one to eliminate local storage issues.
- Office 365 simplifies the workflow by connecting with Microsoft products like One drive and Teams.
- These are a few standard requirements for the Office 365 PST migration. Among many more, there could be some more, like centralized Office 365 management or automatic upgrades of this. We shall now adopt the techniques for executing this migration.
Export PST Files into Microsoft Office 365 - Solutions
Here we will examine the three basic ways PST can be migrated to Office 365. First, we will discuss the most perfect solution. We will then pick up two-hand approaches for this as well.
Automatic Approach - Switching Outlook PST Database To Microsoft 365 Account With Attachments
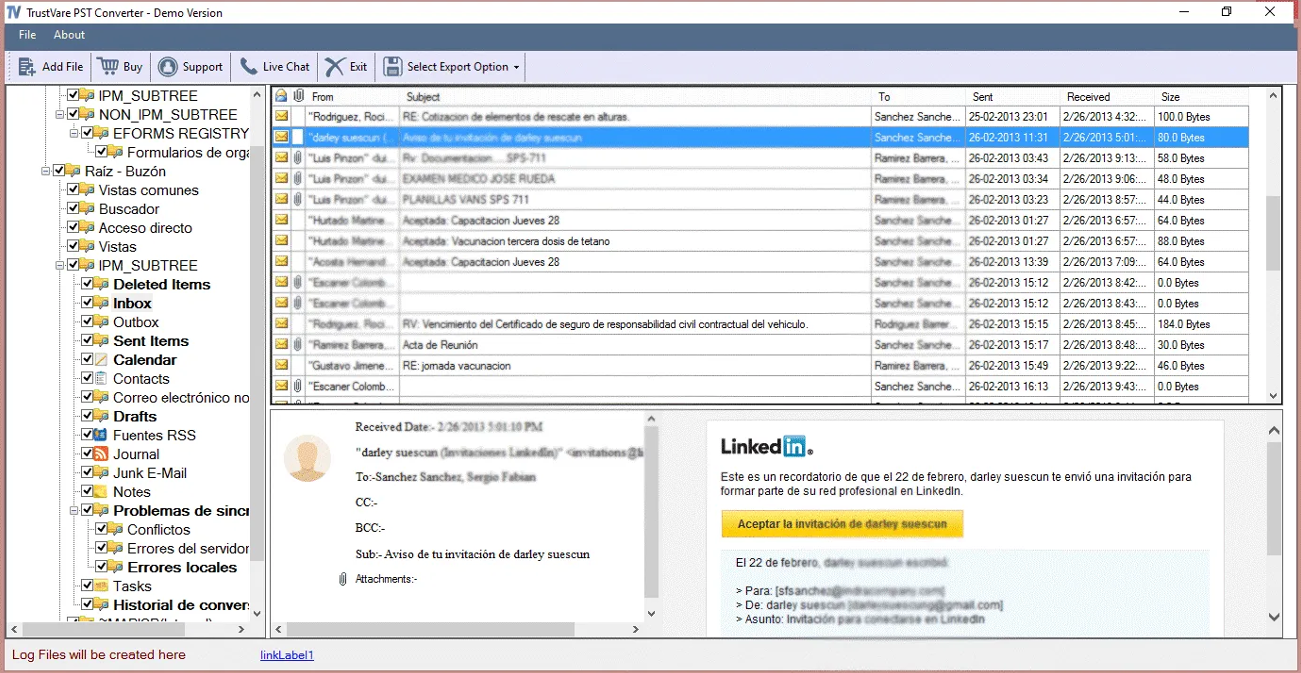
Professionals wanting to switch PST to Microsoft 365 would use the TrustVare PST to Office 365 Converter Tool. Its UI is simple, its attachment handling is perfect, and it moves mass rapidly. This can substantially boost critical time and efficiency during the migrating process. This utility guarantees perfect migration with its various features.
Let's systematically go over the PST transfer to Office 365.
- Download and install the TrustVare PST to Office 365 Converter Tool.
- Find and review the PST files you want to transfer to your Office 365 account then.
- Once you have selected a PST file, you can preview the folders and contents inside each one.
- Then you have to enter the Login Credentials for the target Office 365.
- Press the Restore Options then click the next key.
- Clicking the Convert key will finally enable users to start importing PST files into Office 365.

You now have converted files. This software tool also helps to remove duplicates during conversion. Moreover, users of any version of MS Outlook are free from worries about the created PST files. PST can be migrated to Office 365 in two other ways as well. These manual methods demand technical prowess.
Manual Method to Convert PST files into Office 365 Accounts
#1 Using Outlook's Import/Export Feature:
MS Outlook presents a great ability for file movement. Both import and export are options here. This has a disadvantage as well, since it benefits only limited conversion. Let me walk through the process of moving PST to Office 365.
First, users of this method have to set up Microsoft Outlook with Office 365. Here the processes are divided out:
One could link Office 365 with Microsoft Outlook:
- Access the Microsoft Outlook software on your PC.
- Next, click the File tab. Then select Account Settings under the Info section.
- Click Add Account now found in Account Settings.
- Select Email Account then click Add Account's next button.
- Press next once the email address your Office 365 uses shows in the Email Address field.
- Now enter your password and click Connect.
- Outlook will put your account in an automatically customizable state.
Outlook can be accessed using your Office 365 account after setup. We will now walk over the procedures to migrate PST to Office 365.
#2 Migration PST To Office 365.
- Start Microsoft Outlook on your PC.
- Look, then locate the File tab. Under Open & Export, then click Import/Export.
- Initially, choose Import from another software or file and click next using the Import and Export Wizard.
- Click next once you have decided on Outlook Data File (.PST) as the file type you wish to import.
- Press next, then select the PST file following the navigation.
- Press Finish after choosing the email account linked with Microsoft 365.
- Right now, you can effortlessly view the message files from your Microsoft 365 inbox.
This brings PST files into Microsoft Office 365. Those who go through these processes can move PST data to several Office 365 accounts. We will now walk over the various PST file moving choices.
#3 Straight Network Upload Utilizing Azure Azcopy Tool:
Technically, Azure AzCopy lets one directly upload PST files to Office 365. Customers must first fulfill some criteria before migrating from PST to Office 365, though.
Before Beginning The Migration Procedure, Some Conditions Exist:
- Under the Import/Export approach, Office 365 administrators have to assign the Mailbox Import Export role to the users who will be migrating using an Outlook client.
- Download AzCopy and Network from Network Only the AzCopy tool lets you upload PST files to your Office 365 storage. Azure Storage Explorer cannot enable direct PST file upload.
- PST File Size Limitations: It is not advisable to upload large PST files. Should a migration go more naturally, PST files should be maintained under 20 GB.
- Only if the PST files are located in a network-shared folder to which the utility has access would AzCopy, the migration tool employed, be able to access folders.
- Additionally, importable into an inactive mailbox inside your Office 365 configuration are the contents of the PST file. For example, this could be useful during migration.
We will now walk over the AzureAzCopy Tool PST file uploading method to Office 365. The following describes the actions.
PST Migratory Process of AzureAzCopy Tool Towards Office 365
Step 1: Allocating Rights
We go over here the processes for assigning the roles in the Exchange Admin Center.
- Enter the Roles area of the Exchange Admin Center (EAC) first.
- I am now searching under Admin Roles for Import Export.
- Click Add in the Assessed part that follows.
- Then select the user's suit for importing PST files. The Add option allows you to choose either individual members or full groups.
Step 2: Create a new import job design.
From the EAC homepage, start with Data Lifecycle Management, then Import.
- Click Import PST Files second.
- Select + New import task; then, after giving the import process a descriptive name, click next.
- Click next after choosing to Upload your data.
- ClickShow Network Upload: SAS URL Copy the URL to your clip and download the Azure AzCopy software to upload the PST files.
Step 3: Azure AzCopy PST file uploading
- Download and open the AzCopy tool, then search for the folder containing your PST files.
- Right now, start a Command Prompt window. Using the CD command, change directories to reflect the location azcopy.exe lives at.
- Then run the following command on the command prompt, replacing your current data for placeholders: Azcopy copy "pathTo Folder/ContainingPST"—SAS URL"—recursive=true".
Step 4: Review Upload
We will now investigate the Azure Storage Explorer to verify the PST files uploaded with AzureAzCopy in the following order. Moreover, relevant in any kind of environment, including Linux, macOS, and Windows running this program. The following are the activities:
- Download and set up Azure Explorer.
- Then open the tool past the previous SAS URL obtained into the Blob container SAS URL field. Once again, click next; then connect.
- The Blob container should include the uploaded PST files described below.
Step 5: Mailbox matching PST files
Defining how data from your PST files will be imported into certain Office 365 mailboxes comes in this distinct phase. A second configuration file must be created.
Step 6: Beginning The Important Work
- Once the mapping file is completed and uploads verified, they return to the EAC and the Import Job Creation Process.
- Now check the boxes; I'm done uploading my files; I have access to the mapping file and select next.
- Click + Select mapping file after that; choose your ready mapping file; click Validate to confirm its compatibility.
- Finally, click Submit and then Done to begin the PST import process. The EAC will display a note stating the import is done once finished.
Last Words
We have explored three methods for converting Outlook PST files to Office 365. These include the AzureAzCopy for cloud uploads (a more technical option), the TrustVare PST to Office 365 Migration Tool (a professional software solution), and the standard Outlook Import/Export Wizard (best for smaller files). However, both of the first two methods come with certain limitations. On the upside, the TrustVare software offers enhanced features such as advanced filtering options, smart previews, and automated mailbox mapping, which can provide a quicker and more seamless migration experience.
Share this post
Author

Read the latest articles from Chloe Collins
How Do I Export MBOX to HTML Format on a Windows OS Computer?

July 12, 2024
To open MBOX files in a browser, you'll have to export MBOX to HTML Format on a Windows OS Computer. After exporting the Mailbox to HTML format, users can open the email files in any browser. Here we will go over the various techniques for converting MBOX files.
Learn moreLeave a comment
All comments are moderated. Spammy and bot submitted comments are deleted. Please submit the comments that are helpful to others, and we'll approve your comments. A comment that includes outbound link will only be approved if the content is relevant to the topic, and has some value to our readers.
Comments (0)
No comment