Microsoft Outlook creates two types of data files - Offline Storage Table (OST) and Personal Storage Table (PST) to store the mailbox data. OST files are created when you configure your Outlook account with Exchange Server or IMAP. The OST file, by default, is encrypted with MAPIEntryID GUID key. This means that you can’t directly open or import OST files into any other Outlook profile or account. Whereas, PST files can be directly imported into any Outlook profile or account. So, if you need to migrate OST file data from one system or Outlook profile to another, you need to convert the OST file to PST format. In this article, we will discuss different methods to convert OST to PST with and without Outlook.
Why do you need to Convert the OST File to a PST File?
Here are some scenarios where you need to convert the OST file to PST format.
- Server Crash: Sometimes, the mailbox server crashes due to different reasons, such as virus infection, software or hardware failure, sudden power loss, etc. When this happens, you will be unable to connect with the server and access the mailbox data of your OST file. In such a case, you need to convert the OST file to PST file.
- Server Maintenance: If the server is down due to maintenance, you will be unable to access your mailbox data. If you want to access some of your mailbox data urgently, you need to convert the OST to a PST file.
- Mailbox Data Migration: When you need to migrate your OST mailbox data to another system or Outlook account, then you will be required to convert the OST file into PST format.
- Mailbox Data Backup: You may also convert the OST file data to PST file format for backup purposes. This helps in preventing data loss in case something happens.
Best Available Methods to Convert OST File to PST File Format
There are a couple of methods to convert OST to PST with and without Outlook.
Method 1: Utilize Outlook Import and Export Feature
If you are able to access the Outlook application and the OST file, then you can easily convert the OST file into PST file format by using the Import and Export wizard in Outlook. To export the OST file data to the PST file by using this Outlook feature, follow these steps:
- Open Microsoft Outlook on your system.
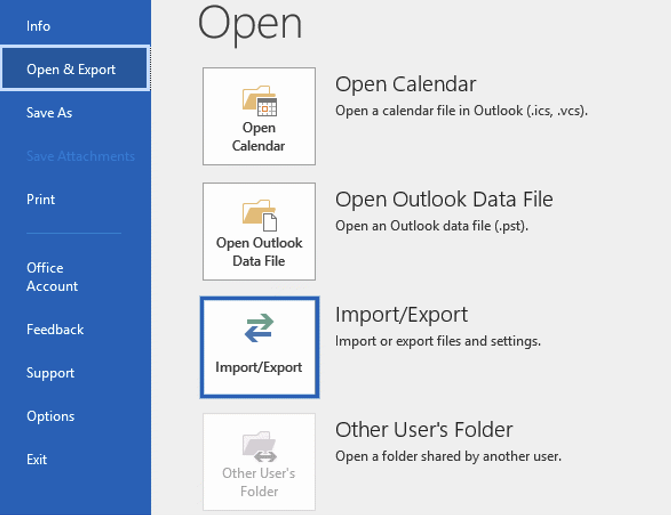
- Go to the ‘File’ option and then click on the Open & Export option.
- Click on ‘Import/Export’.
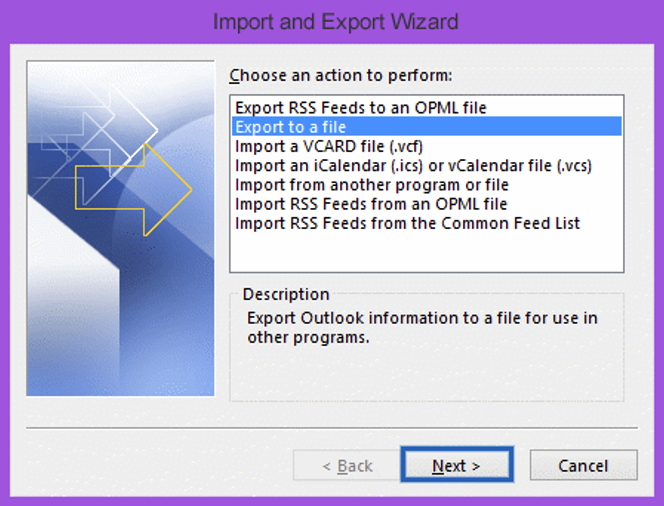
- In the ‘Import and Export Wizard’, select ‘Export to a File’ and then click on ‘Next’.
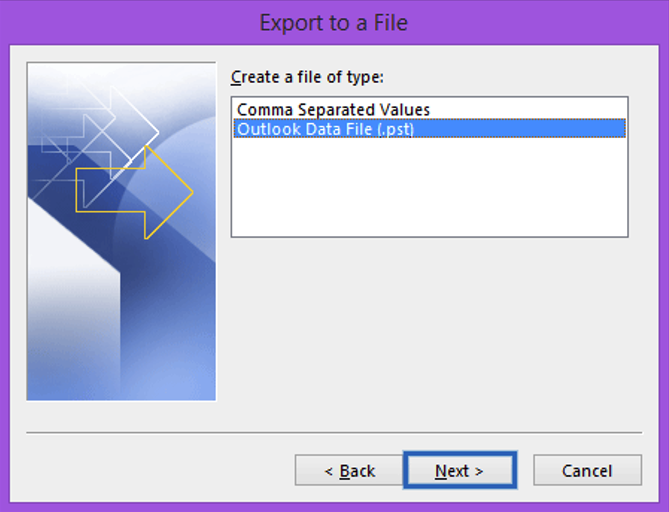
- In the ‘Export to a File’ dialog box, under ‘Create a file of type’, select ‘Outlook Data File (.pst)’ and click ‘Next.’
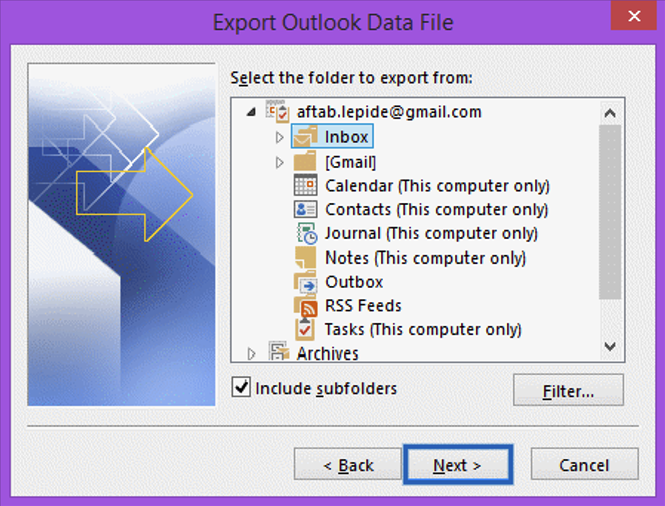
- In the ‘Export Outlook Data File’ window, under ‘Select the folder to export from,’ choose the folders you want to export to PST format.
- Make sure to click on the ‘Include subfolders’ checkbox and then click on ‘Next’.
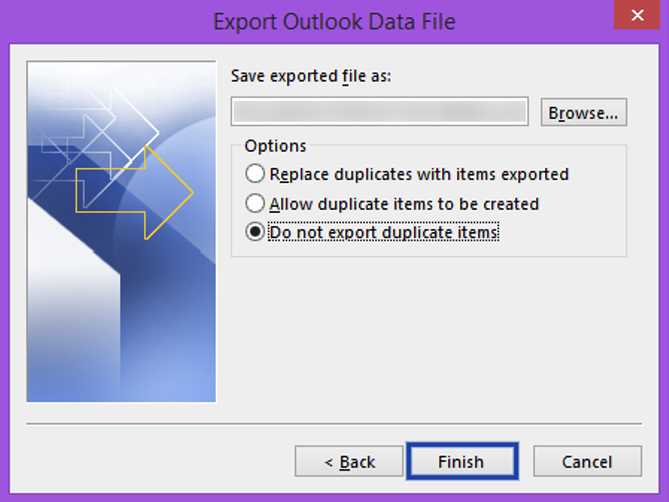
- In the next window, click on ‘Browse’ to choose the desired location to save the resulting PST file. You may also click on the radio button ‘Do not export duplicate items’ to avoid duplicates.
- Then, click on ‘Finish.’ This will convert the selected items from OST file to PST.
Limitations of the above method
- The process is time-consuming and requires technical skills to perform the steps.
- It will not work in case of orphaned and inaccessible OST files.
- It does not allow you to export data from multiple OST files.
Method 2: Use an OST to PST Converter Software
If your Outlook is not working or the OST file is inaccessible, then the best approach to convert the OST file to a PST file is by using an OST to PST converter software, like Stellar Converter for OST. It is an advanced tool that allows you to convert large, orphaned, and inaccessible OST files to PST and other formats, like MSG, RTF, HTML, and PDF efficiently in just a few clicks. Once the OST file is converted to PST, you can open or import the PST file into any Outlook account. To convert the OST file into PST using the software, follow the given steps:
- Download the Stellar Converter for OST software from the official website.
- Install and run the software on your system.
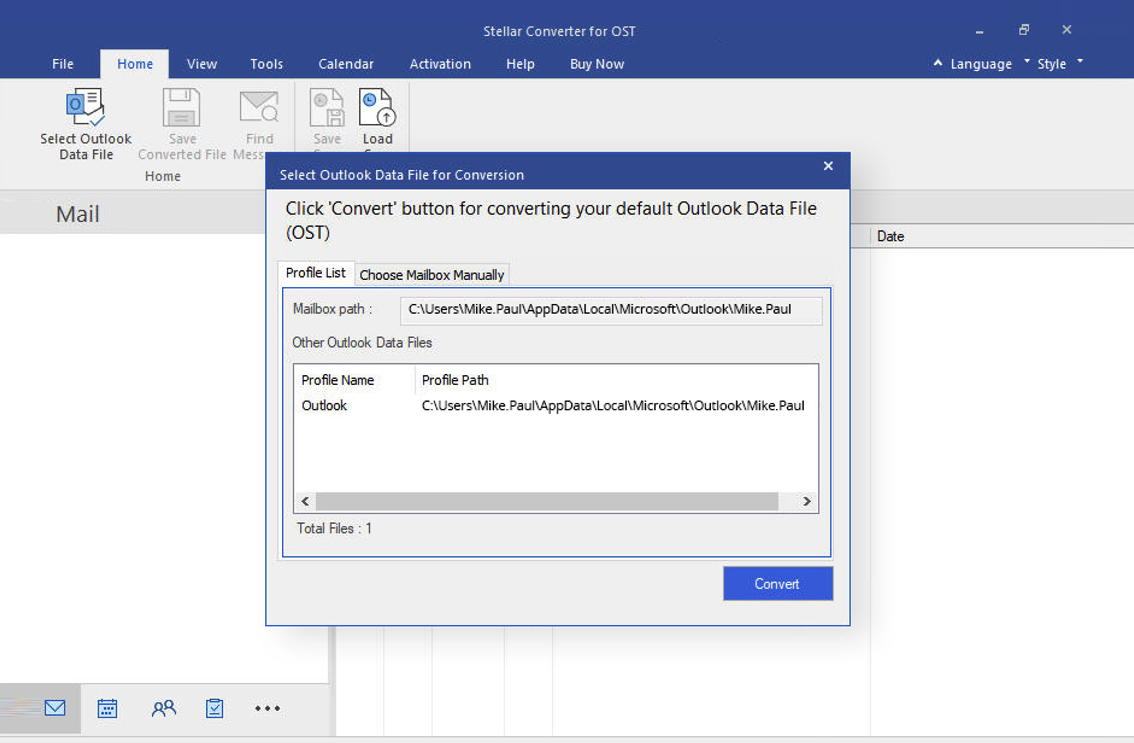
- When you launch the software, a window will be displayed to select the OST file for conversion.
- When you click on the ‘Profile List’ tab, the software will list all the OST files associated with your profile. If you want to select the OST file manually, then click on the ‘Choose Mailbox Manually’ tab and choose the desired OST file.
- If you do not know the OST file location on your system, then click on ‘Find’. After selecting the file, click on ‘Convert’.
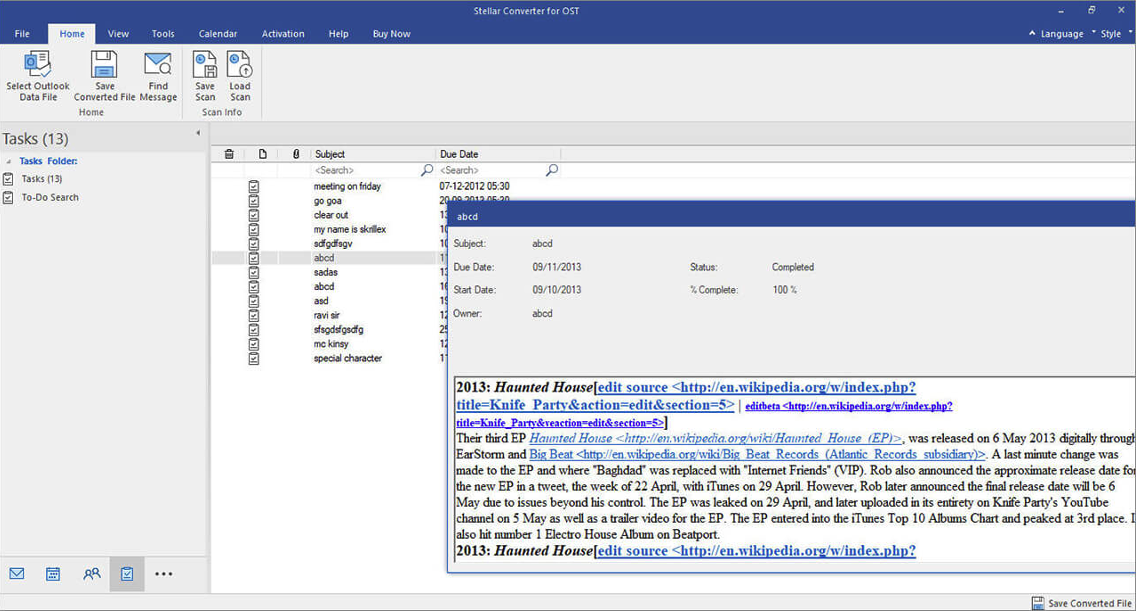
- The software will scan and convert the OST file. Once the procedure is complete, you will see all the converted items. Select the emails or other items you want to save to PST format.
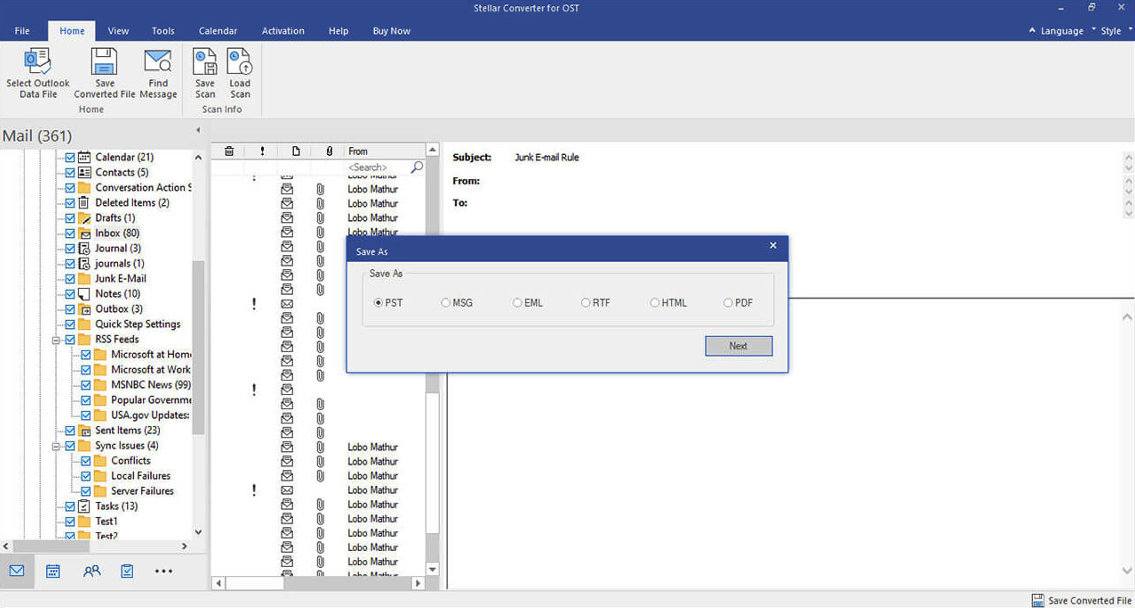
- Then, under the ‘Home’ menu, click on the ‘Save Converted File’ option.
- In the ‘Save As’ dialog box, select ‘PST’, and then click on the ‘Next’ button.
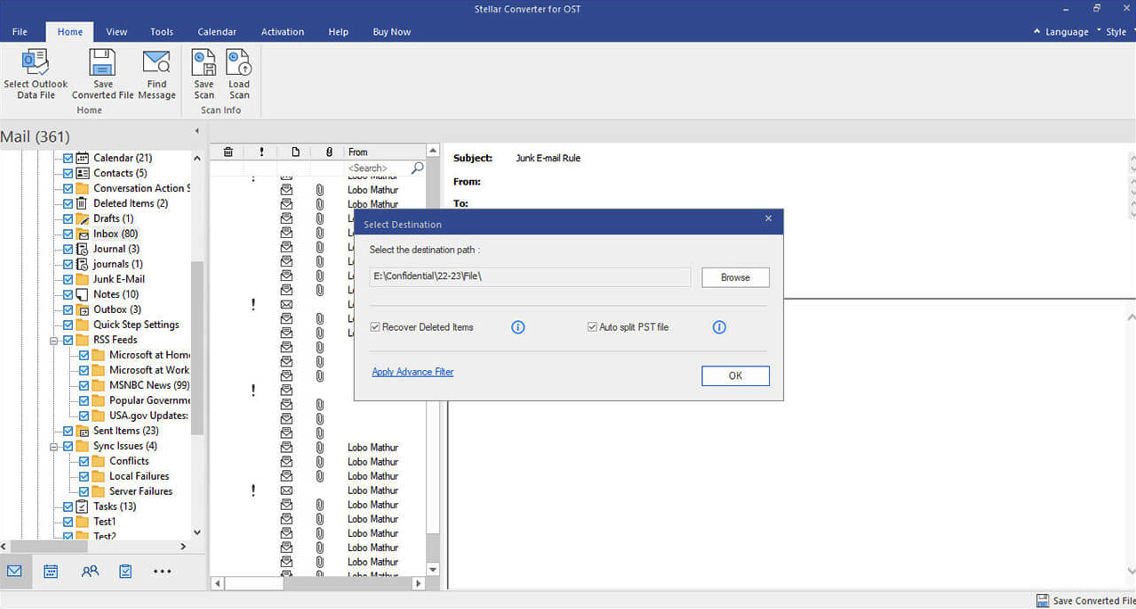
- In the ‘Selected Destination’ box, click on the ‘Browse’ button to select the desired location on your system to save the ‘converted’ PST file, and then click on ‘OK’.
Conclusion
OST file cannot be directly transferred from one account or profile to another. To migrate the OST file mailbox data, you need to convert the OST file to an importable PST format in Outlook. To convert OST files to PST, you can use the Import/Export feature in Outlook. However, this method has certain limitations. For example, it cannot convert orphaned or inaccessible OST files. In such a scenario, the best method to convert OST file to PST is by using an OST to PST converter software, like Stellar Converter for OST. This software is highly effective and efficient in converting orphaned or inaccessible OST files to PST.
Share this post
Leave a comment
All comments are moderated. Spammy and bot submitted comments are deleted. Please submit the comments that are helpful to others, and we'll approve your comments. A comment that includes outbound link will only be approved if the content is relevant to the topic, and has some value to our readers.


Comments (0)
No comment